Setting Up Google Webmaster Tools and Analytics In 5 Minutes
- March 8, 2014
- Posted by: John
- Category: SEO

Setting up Webmaster Tools really couldn’t get any simpler than this.
There are various ways to set up your webmasters tools, some maybe more confusing some maybe really straightforward. But I know there will still be people who are totally zero tech savvy. Which is why I came up with a really simple guide to set up webmasters tools for wordpress sites.
Among all the methods you see in the image 1 below, the recommended method is definitely the easiest. However I am only going to show you base on the alternative method: using “Google Analytics”. Reason is simple, you NEED Google analytics to track almost every data in and out of your website. So since you are going to need analytics might as well do them together! Killing 2 birds with one stone ????
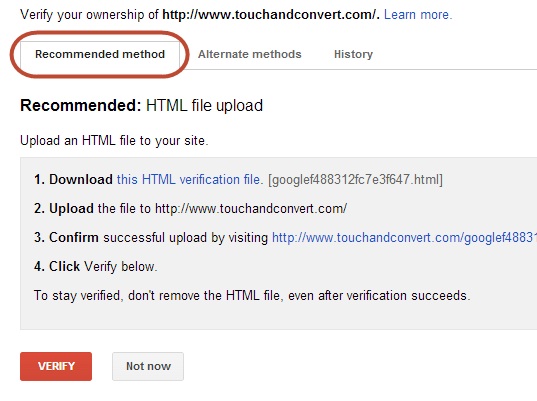
Step 1: Selecting the right option to setup Google Webmasters Tools with Analytics
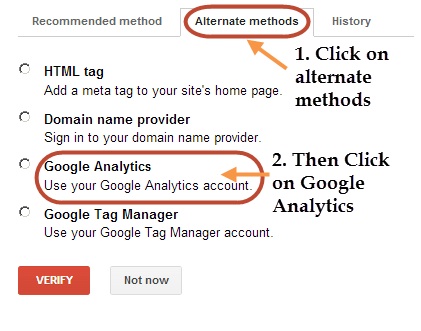
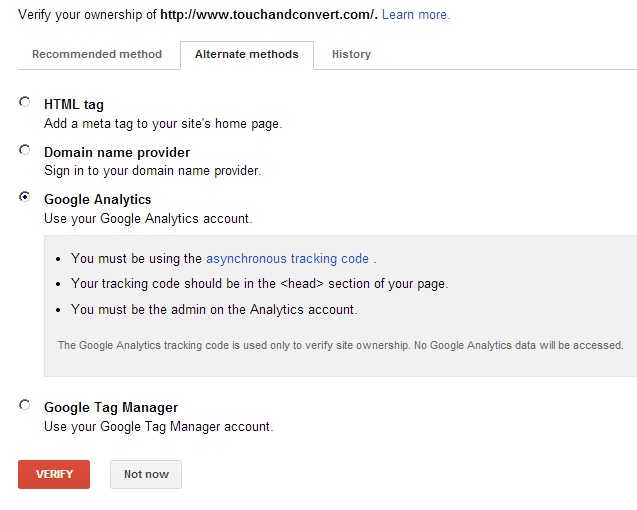
So in image 2 above, you see that the alternate method is selected. Upon selecting alternate methods, 4 other options will become available. So as I said in this example, we are going to set up webmasters tools using Google analytics. Now if you click on the radio button to select Google Analytics a set of instructions will appear below like in image 3. At this point in time do not click on the Verify button just yet.
Step 2: Setting up Google Analytics
The instructions are simply trying to tell you that this verification method will detect a certain tracking code in your header of your website. And this tracking code is also used to track your data in Google Analytics. So then how do we set up a Google Analytics account?

2.1. So open a new window and go to http://www.google.com/analytics/. Click on “Access Google Analytics” like in image 4 above.
2.2. The next page will just show you steps you will be taking to set up analytics. However ignore that as you can just follow my guide by clicking on the “Sign Up” button.
2.3. You will land a page with selections like what you see in image 5 below.
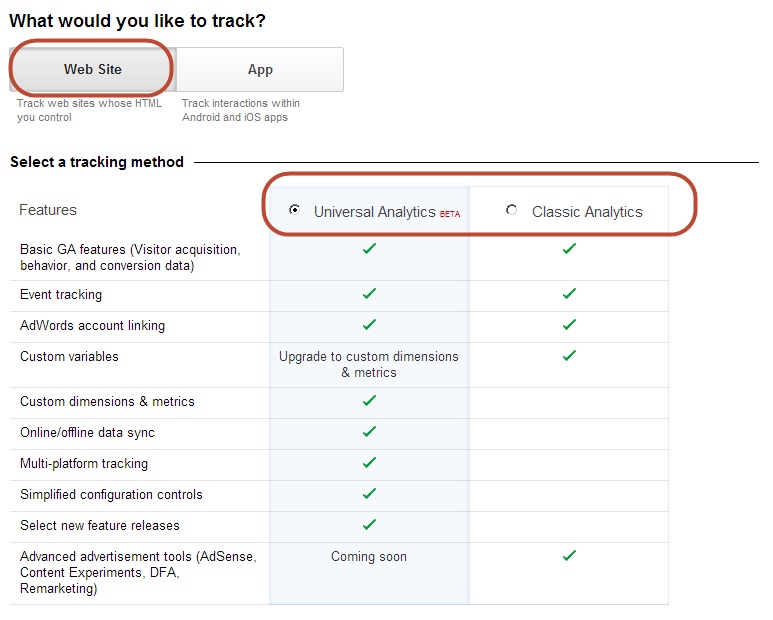
Make sure to click on website instead of app. Apart from that they given you 2 different tracking methods to choose from: Universal Analytics and Classic Analytics. It’s up to you to select any one of them. For myself I am using the Universal Analytics tracking method.
2.4. After selecting your tracking method, you can scroll down to see other options like the image below:
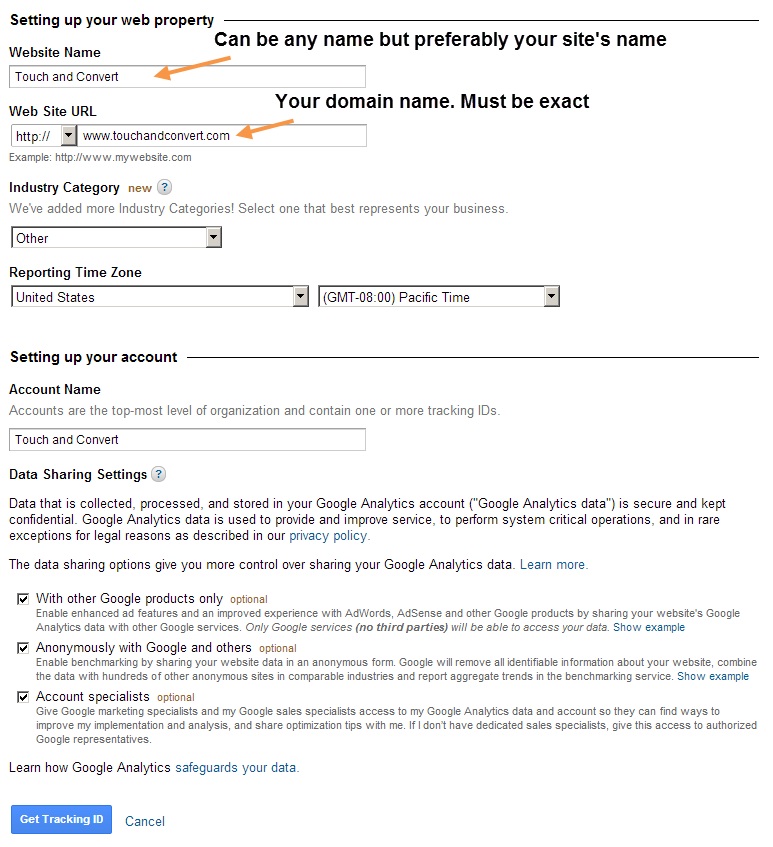
Fill them up accordingly and check all the check boxes below. Then click on “Get Tracking ID” and Google will have a “pop-up” agreement message which you have to agree before continuing.
2.5. You will then land on a page with strings of code. That is the asynchronous code that the instructions of webmaster setup was about.
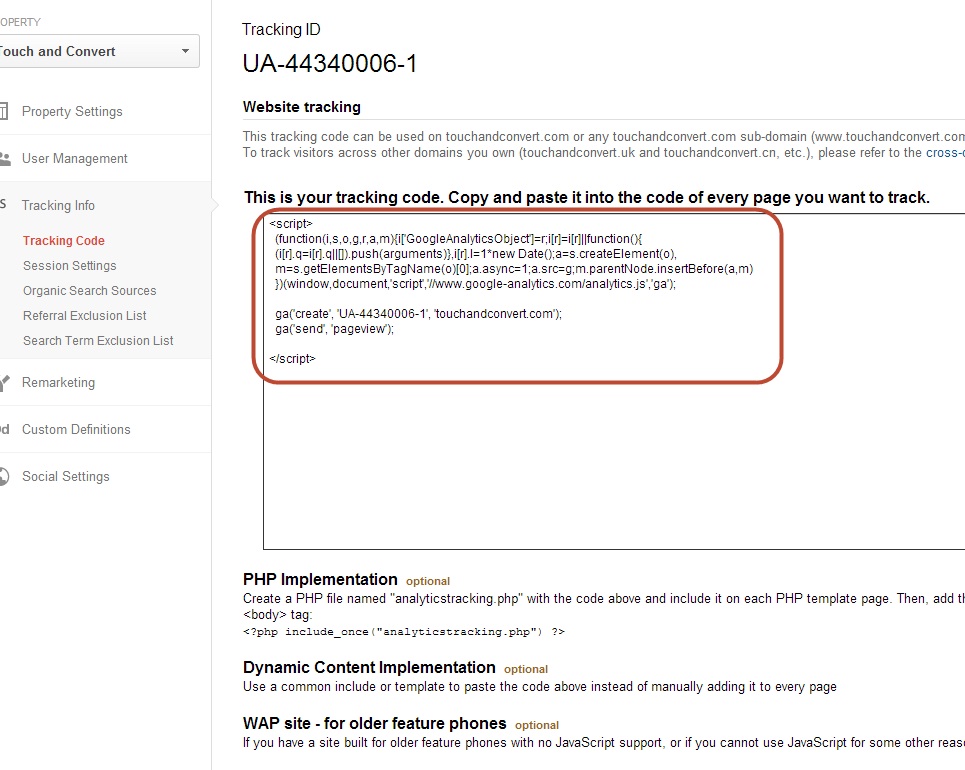
Look at the line that says: “This is your tracking code. Copy and paste it into the code of every page you want to track.” And copy the code below.
To copy this code to every page you will most likely be pasting those codes into your header.php file. So that analytics could track every page. There are a few ways to do it.
Method 1 easiest method
If you are using wordpress, your theme’s option should have a column or field box to paste your tracking code like image 8 below.

Method 2
Going into your server and open header.php with whichever editor you have eg: Notepad and you will see a bunch of php codes like image 9 below.
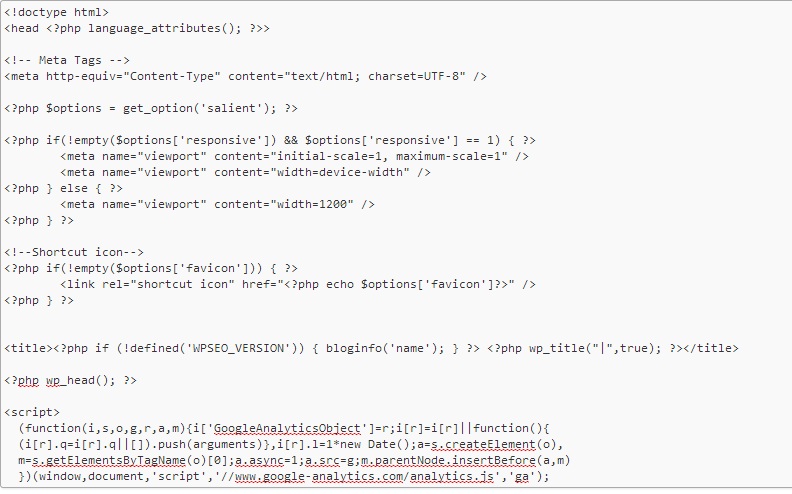
Press CTRL+F and search for and you will find the code in highlight (see image 10) below:

And then paste the copied code above.
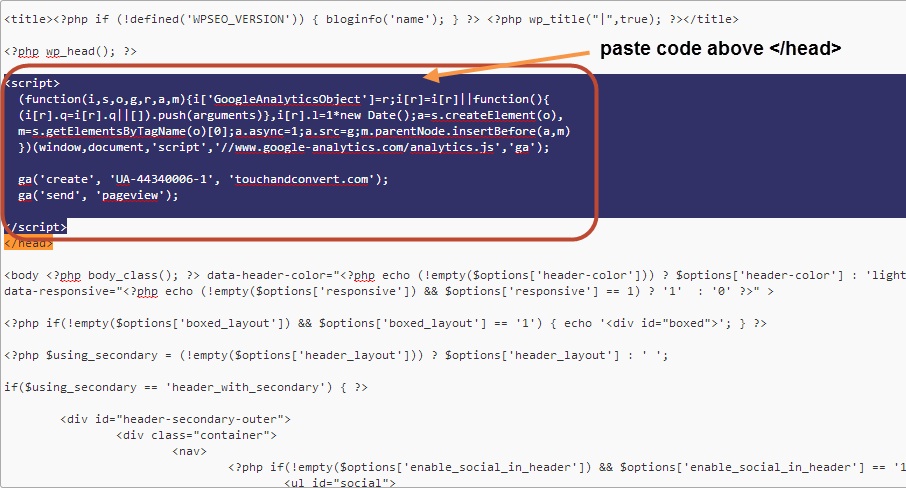
Save the file and upload it back into the server.
Step 3: verifying webmaster tools
Now you can go back to webmaster tools, click on verify and see a success message.

